Edit Boundary Conditions
Description: Edits the boundary conditions.
Boundary conditions are edited in the following procedure:
Select the boundary condition you want to edit in [Object Browser] (Figure 362). Select [Add (Condition Name)] in the right-clicking menu, and the [Boundary Condition] dialog will open (Figure 363).
Click [OK] in [Boundary Condition] dialog, a boundary condition will be added.
Select the boundary condition you want to edit in [Object Browser] (Figure 364).
Select the grid nodes (or grid cells) you want to set boundary condition (Refer to Select the node).
Set boundary condition to the selected grid nodes (or grid cells).
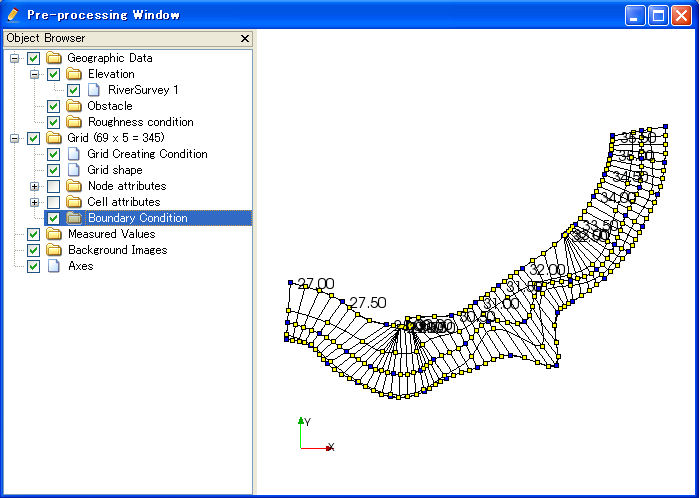
Figure 362 [Object Browser] when selecting Boundary Condition
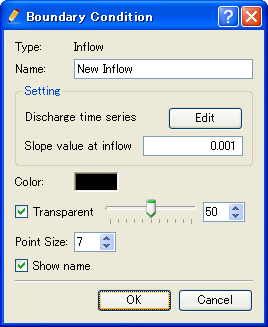
Figure 363 Example of the [Boundary Condition] dialog
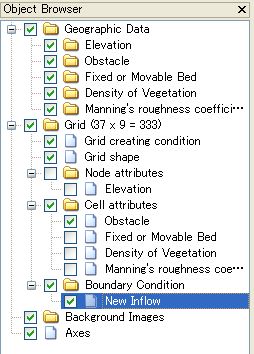
Figure 364 [Object Browser] when selecting a boundary condition item
You can set (or unset) boundary condition as follows:
Menu bar: [Grid] (G) –> [Boundary Condition] (B) –> [Assign Condition] (A) / [Release Condition] (R)
When you want to add or remove boundary condition, use sub menus under the following sub menu. The items in this submenu differ depending on the solver you use.
Menu bar: [Grid] (G) –> [Boundary Condition] (B)